Crab Pot Mesh and Weedmat Wicking Beds are cheap, easy to build with simple home tools, and can be made in any shape or size to suit your requirements. Our designs minimise waste of mesh, plastic, and time. Despite their simplicity, they’re exceptionally durable—our beds built in 2010 still show little to no wear in 2025.
They consist of:
- a frame – made of light crab pot wire mesh 40mm x75mm, weed mat and builders’ plastic,
- a water reservoir – made from 90mm storm water drainpipe,
- an overflow – made from 13 mm poly pipe and fittings, and
- a stabilising wire – made from 10 gauge wire and a piece of garden hose.
Building Your First Bed
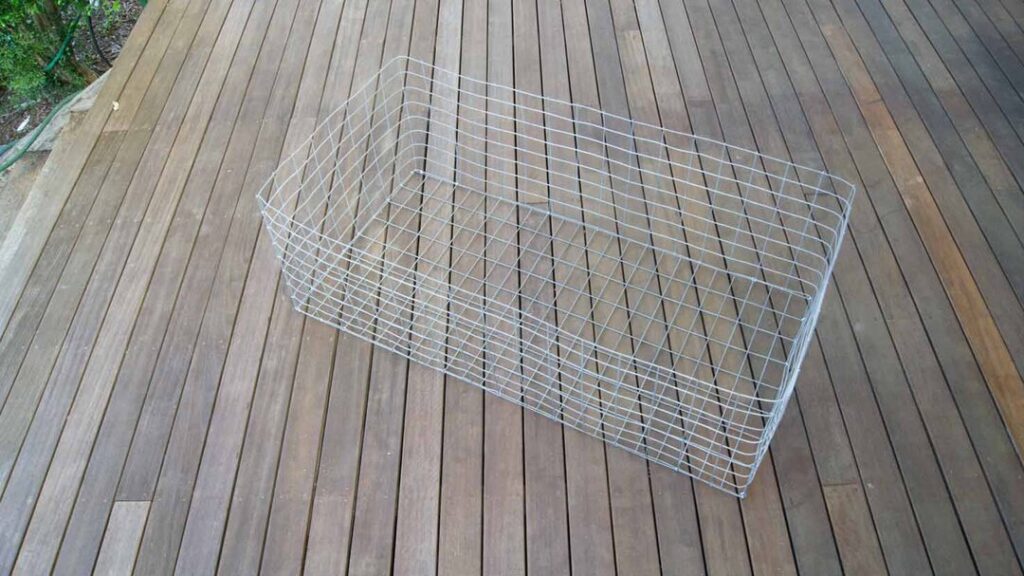
The instructions below will guide you through building your first set of mesh wicking beds. A 5.6m length of mesh can make three beds of 1.22m x 635mm – two 400mm high and one 300mm high. The shallow bed is suited for shallow-rooted crops such as beetroot.
The Frame
Materials for the Frame
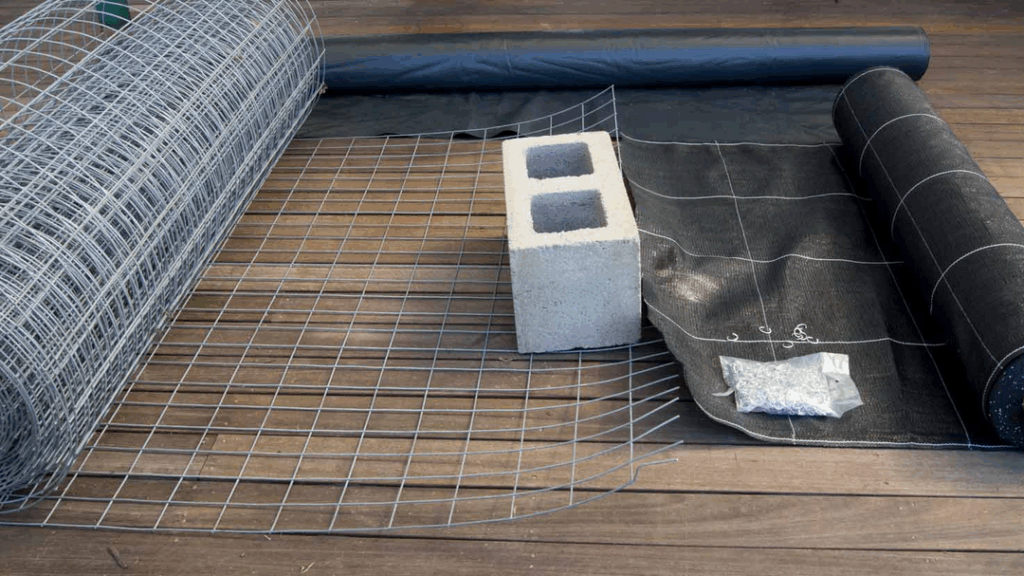
In the photo above, as seen from left to right:
- Crab pot mesh 1.22m wide
- 4m wide builders‘ plastic used doubled up
- 1m wide weed mat
- C-clips
- (not shown) 10 Gage wire and a length of garden hose.
Tools Needed for the Frame
To assemble the frame, you will need:
- Large bolt cutter to cut the mesh
- C-clip pliers
- Small bolt cutter to cut failed C-clips
- Pair of pliers to remove those cut bits
- Tape measure
- Chalk to mark the plastic and weed mat
- Scissors to cut the plastic and weed mat
- A long straight piece of wood.
Assembling the Frame
| Floors | Cut three pieces 8 rectangles wide (635mm) from the 1.22m wide roll for floors. |
| Walls | Cut one length of 3.6m of the roll (48 rectangles). Cut this lengthwise into three walls: two of 400mm and one of 300mm wide. Cut off the loose bits of wire. |
Clipping a frame together. (We suggest working on a table and do the 300mm wall first.)
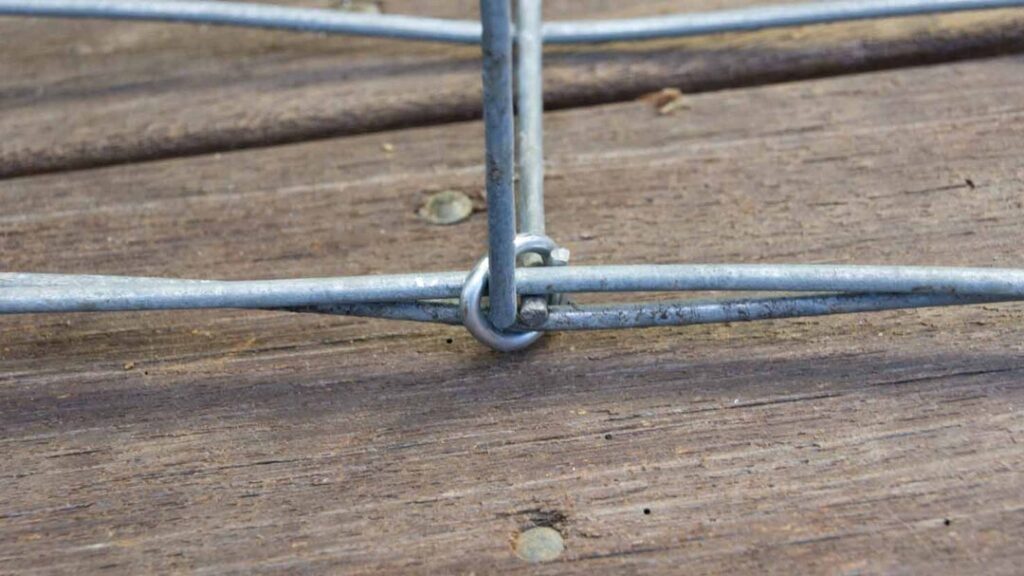
Straighten 16 rectangles of the wall, and clip a corner of the floor at the long side of the bottom plate to the first rectangle of the wall. Then clip each second rectangle to the corresponding one of the walls.
The 16th row of these rectangles is longer than the floor plate. Bend it 90 degrees in the middle and straighten the next 8 rows. At the corner, clip it in both directions to give the bed its rigidity. Again, bend the 8th row of these and straighten 15 rows. Bend the next 8 rows and straighten them. The last row sticks out, bend it 90 degrees and clip all 8 rectangles along the height to the corresponding ones of the first row, again for rigidity.
To bend the wire mesh neatly and with minimal effort, place the long piece of wood along the bend line and use it as a lever or straight edge – pressing or pulling against it gives you a clean, even fold without needing special tools.
The Weed Mat
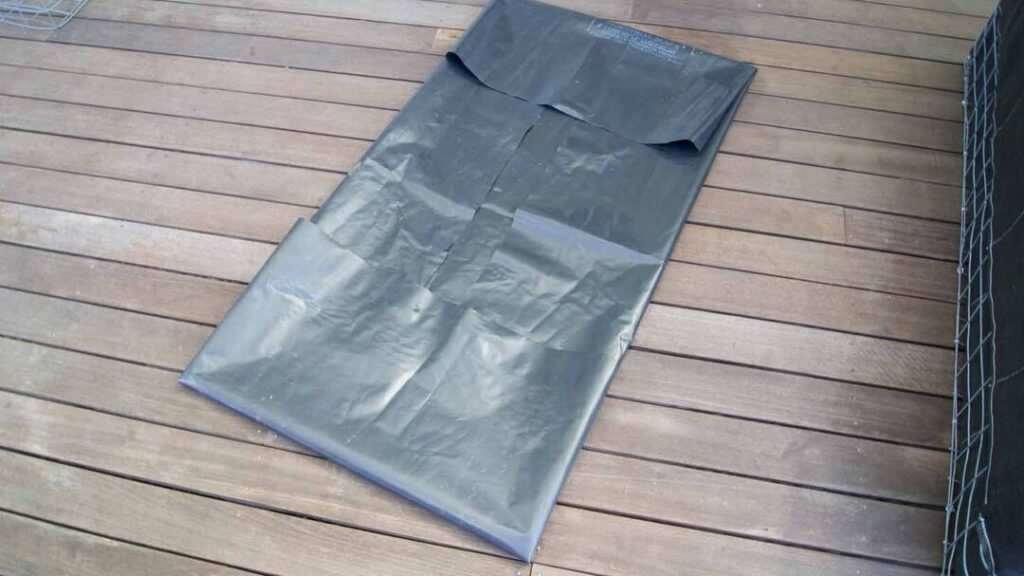
Cut three lengths of 3.85m of the weed mat (250mm extra as overlap). Concertina-fold each length for ease of placement.
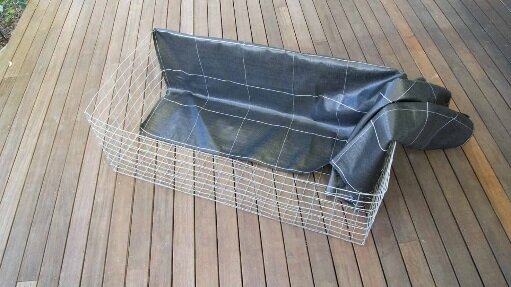
The mat covers the floor, one inside wall and part of the opposite outside wall in the high beds and all of it for in the low beds. Unfold these onto the frame, starting in a corner along the floor, then up and over the opposite side. At the starter corner, clip the mat in a few places along the floor and vertical side to keep it in place, and unroll it.
At the end, clip the vertical outside bit to the frame so it stays tight; the inside will be held in place by the soil. Press the corners In tight to prevent stress later.
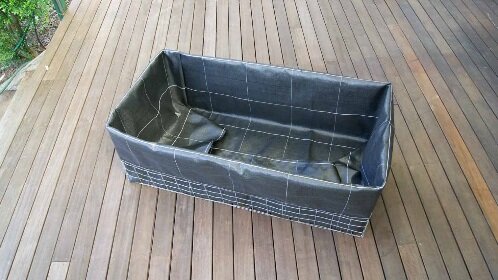
The Plastic Liner
Cut two pieces of 1,800mm x 1,200mm plastic liner for the taller beds and one of 1,600 x 1,000 for the lower bed. Fold the sides of each piece as an envelope, the size of the bottom plate, 1,200mm x 600mm.
Place the plastic liner in the bed, unfold it while making sure the corners are vertical.

The Stabilising Wire
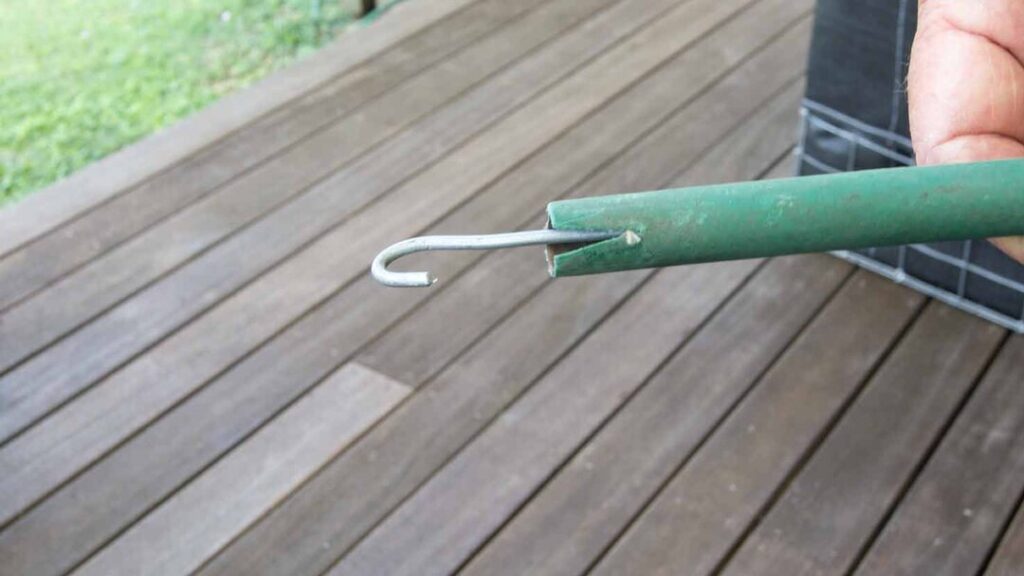
Cut 590mm piece of garden hose as cover for the stabilising wire, with a V at one end.
Cut a 660mm piece of 10 gauge wire and bend 30mm at one end, slide the wire through the garden hose sharply so it is 600mm long and bend the wire at the second end.
Put the stabiliser in last when everything else is in place.
The Water Reservoir

Materials Needed for the Water Reservoir
To make the water reservoir assembly, you will need:
- 90 mm PVC storm drainpipe
- 90 degree 90mm PVC bend
- 90mm mosquito screen (compulsory in Townsville and for schools, recommended elsewhere)
- 90mm PVC end cap to keep the water in and thirsty bush rats out – This comes from experience!
Tools Needed for the Water Reservoir
- A piece of lino with one straight edge, an elastic band and a pencil to mark the cuttings on the PVC pipe.
- A hacksaw to cut the PVC pipes.
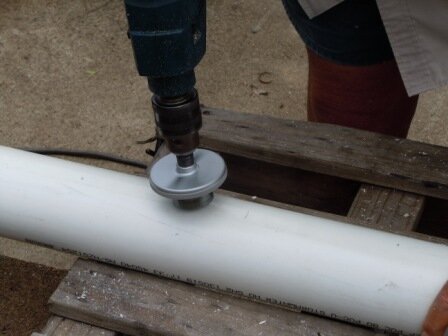
- A drill, a 60mm hole-saw for the drainage holes in the PVC pipe, a 12mm drill bit to cut a hole in the PVC pipe for the overflow.
- A small pair of pliers to remove the cut-out bits from the hole-saw.
- A pair of scissors to cut the liner and the weed mat.
- A pair of nail scissors to cut the outlet hole in the liner and weed mat.
- Masking tape to hold the liner in place while filling the bed with soil.
Assembling the Water Reservoir
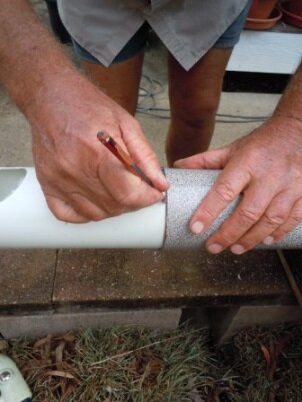
With a piece of lino with one straight side as shown, mark one length of 1.150mm and one 500mm of the 90mm storm drainpipe. On the long length, mark the centres of the holes, the first one at 250 mm of one end, the next two at 350mm and cut the pipes. The elbow goes at the 250mm end and the end cap goes at the other end.
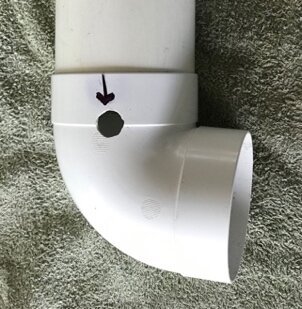
Place the 90° PVC bend so that the holes in the PVC pipe reservoir face down and drill a 12mm hole 100mm above the floor level as shown above.
File this out 1mm, so the poly pipe will fit snugly.
The Overflow
Materials Needed for the Overflow
For the overflow, you will need:
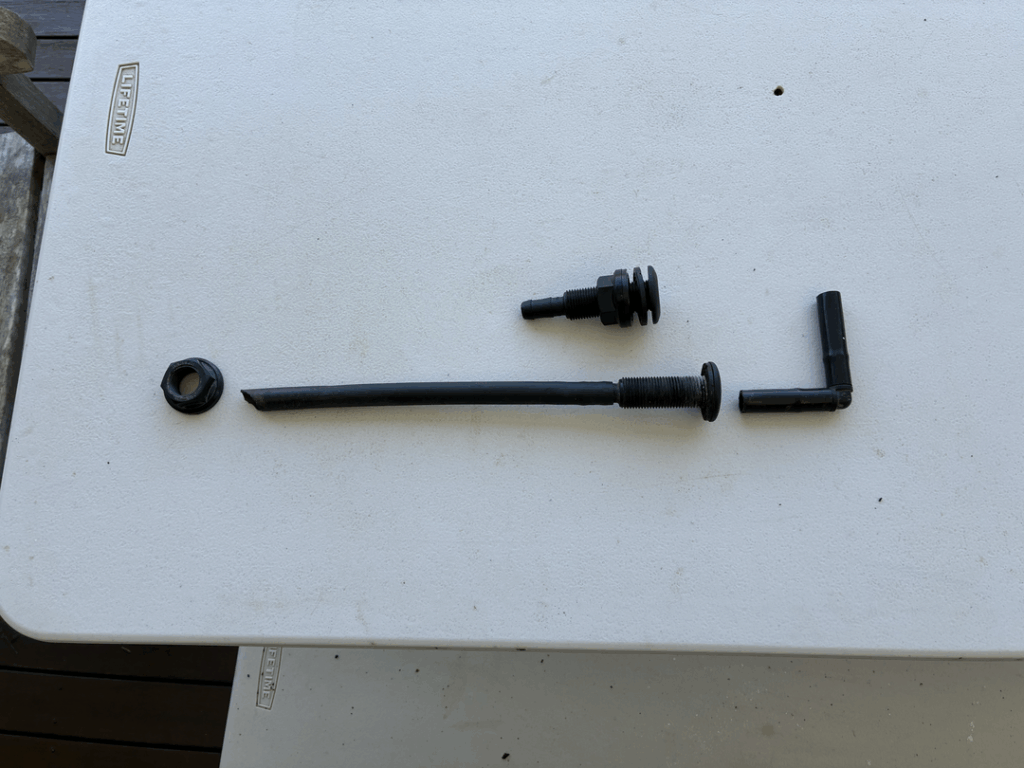
- Water-tank outlet
- 13mm poly pipe: one length of 220mm and two of 50mm
- 90° 13mm poly pipe bend
Tools Needed for the Overflow
- Strong scissors or a poly pipe cutter.
Assembling the Overflow
Cut the poly pipe into one length of 220mm and two of 50 mm.
Diagonally cut one end of the 220 mm length. It is to be inserted onto the fill pipe with the opening down, so the water flows out when the water flows out when re-filling the reservoir when it is full. Cut a 20mm hole through the liner and weed mat, 950 mm from the bottom and opposite the hole in the PVC pipe.
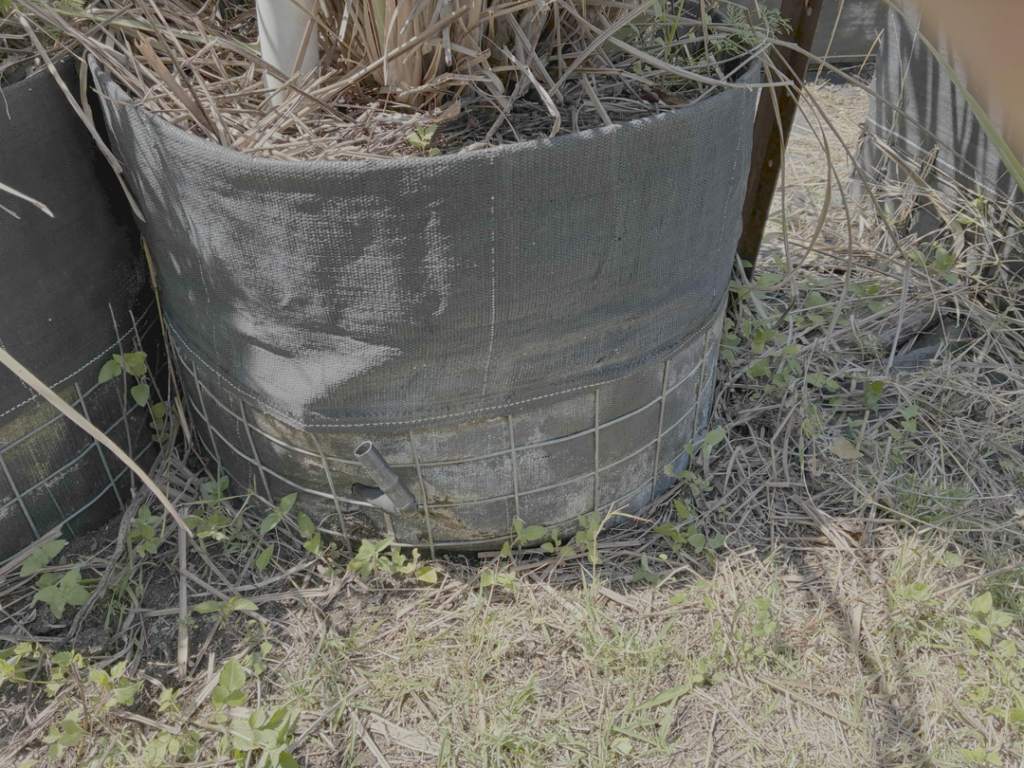
Placing The Overflow
Unscrew the nut and one washer of the tank outlet, leaving one washer at the outside.
Push the outlet from the outside in through the 20mm hole in the weed mat and liner, and screw the nut and washer back on from the inside.
Push the uncut end of that 13mm poly pipe onto the tank outlets’ 12mm and the cut end into the fill pipe with the cut facing down.
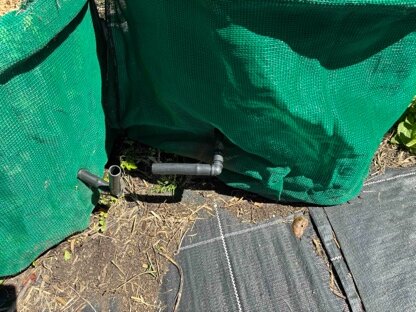
At the outside, place the two short bits onto the 90° bend and push one end into the tank outlet. These can be swivelled to raise the water level in the bed when needed.
Soil
The volumes of the beds are respectively 288L and 216L. Allowing for 30mm freeboard for mulch, the rectangular bed needs about 270L of soil and the round bed 195L. See Mixing Your Own Healthy Soil for Wicking Boxes and Tubs to get your own healthy soil.
When filling the bed with soil, make sure that there are no corners of the lining lying flat; all the plastic must be upright against the wall. If needed use, duct tape to hold it in place – learned the hard way.
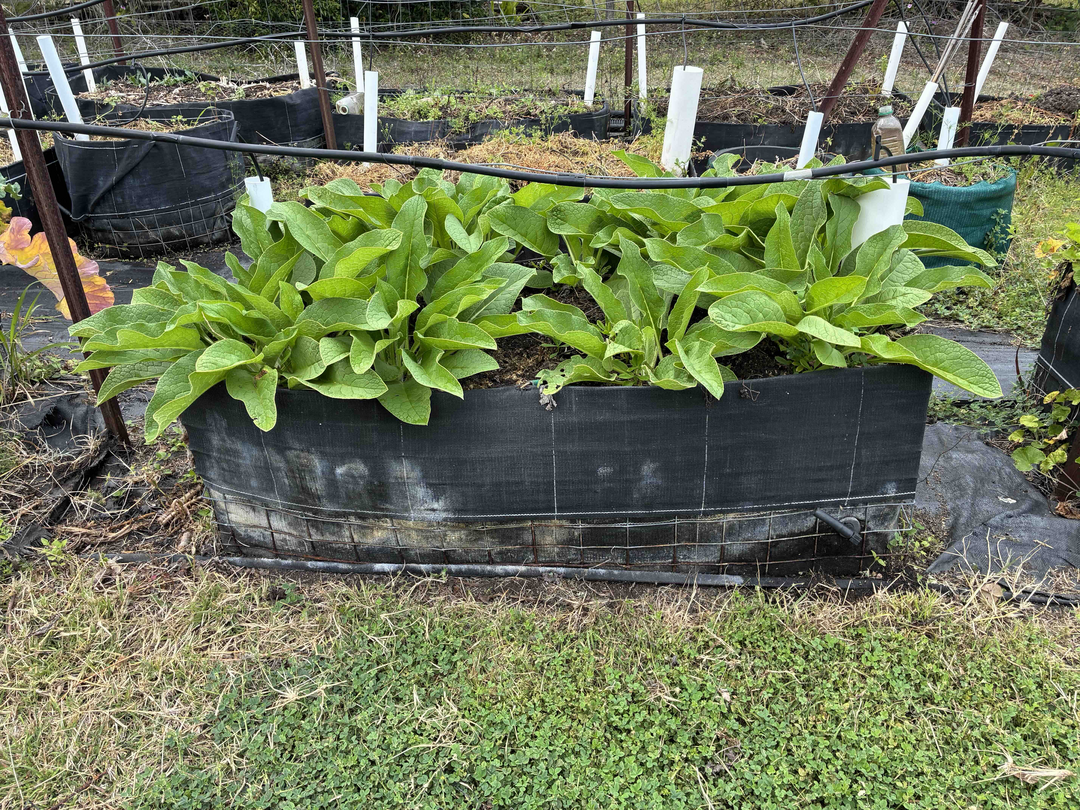
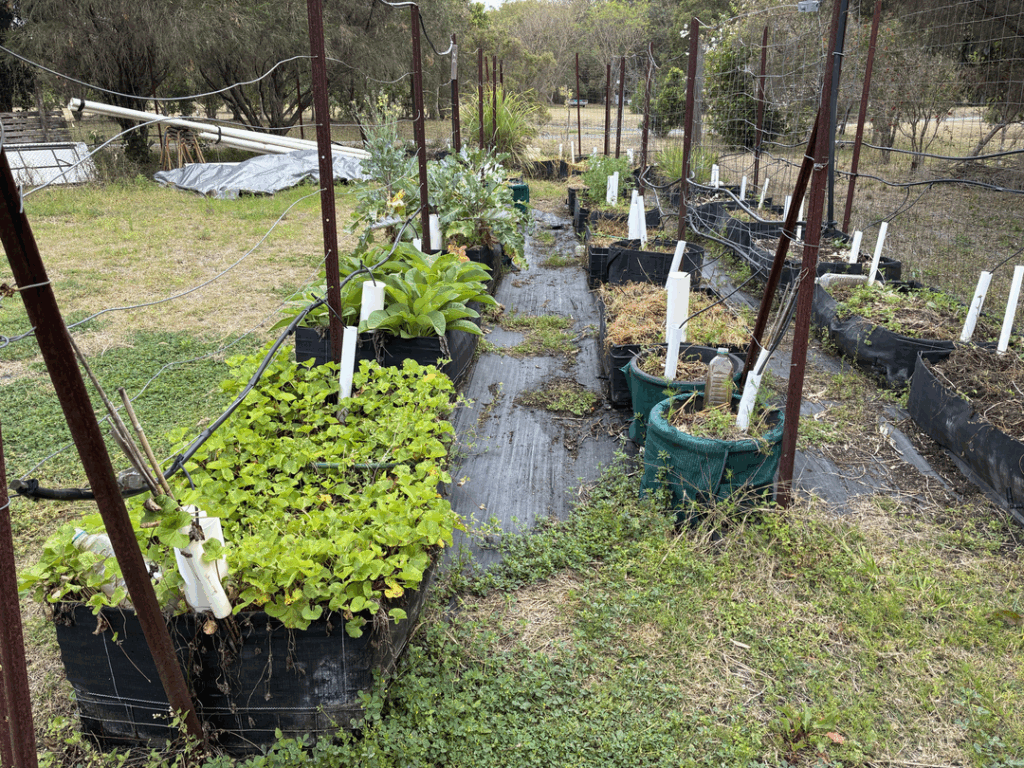
Weed Control Around the Beds
In the photo showing the overview, we covered the area below and between the beds with builders’ plastic and then weed mat. While weed seeds still germinate and grow their roots under the beds, they are easy to pull out as their roots cannot grow through the plastic.