A starter is a brilliant and essential tool for gardeners who want to treat large gardens to control diseases and improve overall plant health.
The starter combines local soil biology with a growing medium and foods to multiply the biology within. Gardeners may then apply this starter directly to the garden with a watering can (see DIY Compost Tea – Application of Starter for Gardeners for more details on how to apply) or can be brewed to further enhance it.
Building a starter is a simple task. Simply gather a sample of the local soil biology and uniformly mix the required ingredients. Each mix provides enough for 10 to 40 square meters. There are two recipes we advise depending on whether you have worm-casts available to you which can be found in Building up Your Mix.
Collecting Local Soil Biology
Collect local soil biology from undisturbed areas with long term mulches. Avoid areas that are cultivated or have had fertilisers or chemicals applied. Look under mulches, along fences, near compost bins, maybe a friend’s garden or local creek. The soil needs to have a surface mulch and beneath that a crumbly layer of fine mulch and crumbly soil.
Push aside the mulch (the layer of dead leaves and sticks) and scrape off the crumbly 1-2 cm layer which is the active layer. Collect about a litre for several starters.


Store in a cool moist container. Avoid water-logging or drying out the soil in order to maintain and keep the soil biology alive.
Building Up Your Mix
Once collected, it is now time to enhance the soil biology you have collected and cultivate it into a starter which you can apply to your soil.
Worm Cast Based Mix
Uniformly combine and mix:
- 3 litres fresh worm-casts
- 1 litre Mill Run — bran and pollard. It is high in minerals and energy and is available as chook-food from most produce stores or any bran from a supermarket.
- 50ml molasses or 25g sugar dissolved in 200ml warm water for evenness of distribution.
- 300ml of local soil as collected earlier.
Soil Based Mix
Collect the three litres of soil from the soils top layer complete with natural worm-casts, healthy soil from a good bed and soil from around an established tree.
Uniformly combine and mix:
- the three litres of the collected soil
- 1 litre Mill Run — bran and pollard. It is high in minerals and energy and is available as chook-food from most produce stores or any bran from a supermarket.
- 50ml molasses or 25g sugar dissolved in 200ml warm water for evenness of distribution.
- 300ml of local soil as collected earlier.
Growing the Starter

Once mixed, add water till just able to squeeze a drop of water, no wetter. This may need around 0.5 to 1 litre.
Place the mix 8 to 10 cm deep, on the ground in a cardboard box or tray with drainage and in a shady place. Compress it gently, like compressing soil around seedlings. Excess compaction will exclude air and stop desirable biology growing.
Cover with a heavy wet cloth to maintain humidity. Twice a day, re-wet the cloth in a bucket of water, wring it out and put back over the starter.
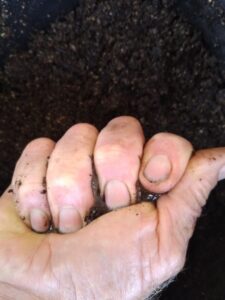
A slight warming will occur after 12 to 24 hours which indicates strong biological activity. It is important to check by hand for warming and make sure it is going well.
Checking if the Starter is Ready to Apply


The amount of time it takes for a starter to be ready varies and may be after 24 hours in summer or 48 or more hours in winter.
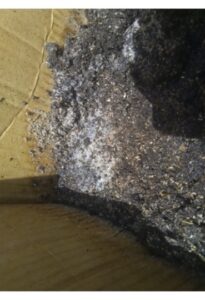
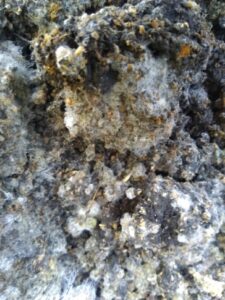
When fungi cover the surface, open the side of the box and break the starter top to bottom to check that fungi are throughout the medium. If you can see white or grey threads throughout the starter, it is ready. If not, put it back and give it another day.
What’s Next?
Now that your starter is complete you can apply it to your garden directly, you can learn more about application in DIY Compost Tea – Application of Starter for Gardeners

